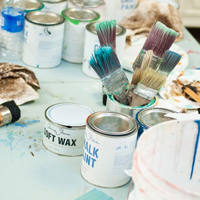
The best paint out there for refinishing furniture is $160 a gallon! GASP! You actually don’t buy it in gallon size, but at $40 per quart plus $15 to ship it, it is waaaaay out of my price range. It’s called chalkpaint. You can’t get it at Home Depot, Ace or Lowes. I’ve never seen it sold at a discounted price on ebay. I could buy it at the Pasadena Flea Market, but have to add the price of gas plus $10 admission to the cost of a can. The benefits of chalkpaint you ask?
Chalkpaint is made with a unique formula that doesn’t require any prep work. Which means, no more sanding furniture to prep for painting and no priming required. Awesome benefit and huge time saver!
The application of chalkpaint is incredibly smooth.
And, chalkpaint distresses very nicely. Both the process of distressing and the outcome.
The disadvantages: obviously price being the biggest disadvantage. The lack of accessibility. It’s not like I can just run down to the store to grab an extra can if I run out. And, the colors are limited with only a about two dozen to choose from. Although, you can mix and match to make virtually any color you desire.
So, in typical “Michele” fashion, I think to myself…”there must be a way to make my own chalkpaint.”
And, I did. I have several different recipes to try out, but this is the first one and I was really excited about the results.
I tried my first home made paint recipe on this awesome vanity I picked up Saturday (In hindsight, I probably should have picked a piece of furniture I didn’t like so much just in case it didn’t work out).
I mixed my recipe.
I decided to play it safe with an antique white. I was a bit worried, though because I couldn’t smooth out all of the clumps from the powder I used.
This is what it looked like when I first applied it to the furniture (keeping in mind, I didn’t do any traditional prepping).
It’s hard to tell, but you can barely see the little clumps. Fortunately, when I started brushing it in, the paint completely smoothed out!
The clumps went away and the brush strokes were minimized. Yay…success so far!
The typical piece of furniture takes three coats of paint. One coat of prime plus two coats of color. Being that I wanted the benefits of chalkpaint, I wanted to pull this off with only two coats. Coverage with two coats of paint was pretty good. There were a few spots of touching up and a very light third coat did the trick.
And the final result….?
This is such a tease! I’m not done with it yet so you will have to wait! Find me on facebook to see the after picture of this vanity! Give me a few hours to finish, though!
Off to work!


Hi,
Are you going to be sharing your recipe or did I miss that. Your newest follower.
Lisa
very excited to see the outcome so i’ll be hunting you down on FB! pls. share your “recipe” if you’re happy with the results!
amy
We like it, but we need the recipe. You know we’re ALL DIY-ers here! Do share.
Yes I have to agree the “real” chalk paint is very $$.
I just found out about it. I’d love to find a economical way to make my own.
As I am a newbie to this whole painting thing…
Please do share your recpie with us!
I try and read your blog a few times a week.
I have also been to your store and loved it!
Ronnie A.
Sweet & Simple Baking Co.
I really enjoyed reading your process with respect to the chalk paint, Michelle. Guess the saying “Necessity is the mother of invention” is really true. You did a terrific job and your furniture piece is awesome. I have joined your followers list and look forward to returning. I hope you will join me as well and grab a blog button as well. Hugs, Gayle.
Looking good so far but we need the recipe. lol.
I use emulsion paint at the moment which dries a bit chalky and brush strokes are obvious but once it’s had a final sand down all the brush strokes completely dissappear and it’s perfectly smooth.
I have nothing to comapre it to though so would love a chalk paint recipe.