If you’ve ever pulled out a can of Pure White Chalk Paint® then you know first hand it isn’t one of those Annie Sloan paint colors that goes on effortlessly with just one coat. If anyone tells you it is a one coat color, they are lying. LYING I TELL YA’!
I’ve never worked with a white that covers in one coat, and it’s the lack of color pigment that requires multiple coats of paint for clean coverage. There are some techniques, however that allow you to minimize the amount of Pure White needed for a job.
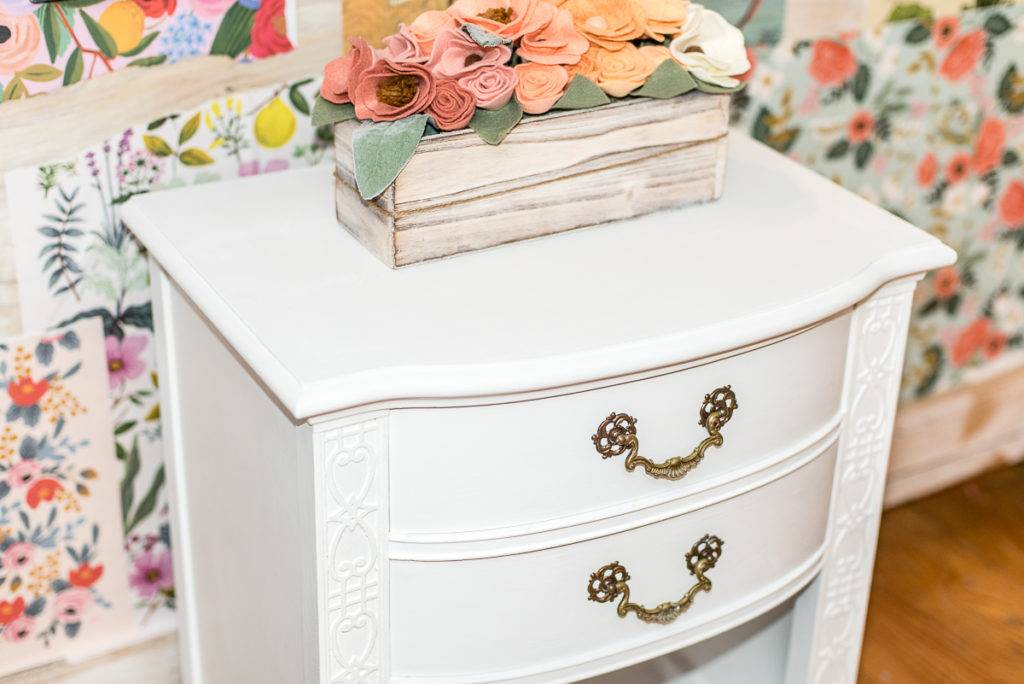
I just finished painting this cute nightstand for a customer with a clean finish in Pure White and Clear Wax. So, I’ll go over the process for how I approach working with Pure White.
- Clean your furniture well. This guy was dusty and there was quite a bit of buildup in the corners of the shelf. A damp cloth is usually sufficient to remove any dust and dirt.
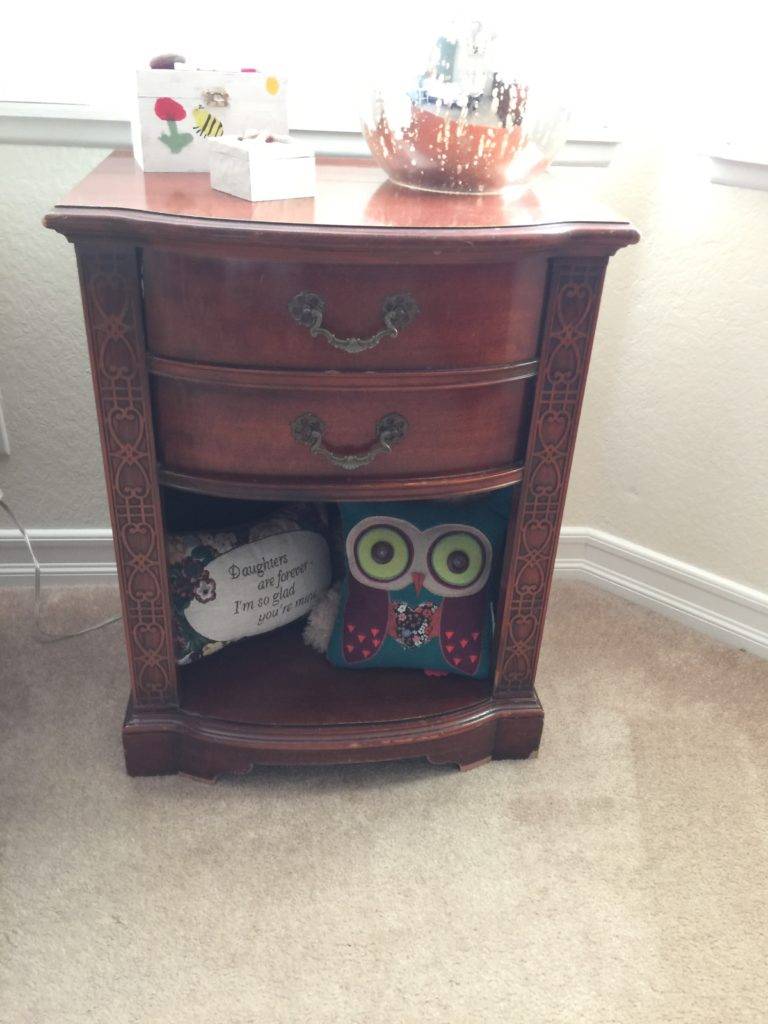
- Recognize the potential for bleed through. Oak, mahogany and cherry wood have a higher tendency to cause problems with bleed through. Although, I have experienced bleed through happen with pine and maple before. Regardless of your paint product, bleed through can happen as tannins are released in the wood through the paint. The picture below is a classic example of what bleed through looks like after you apply paint. If your substrate has a lot of chipped polyurethane, it is likely that the tannins will bleed though in those areas. And, if you notice the nightstand above, there were a number of areas where the top coat had chipped and the raw wood was exposed to the paint products.
![]()
3. When I use Pure White, I always do a first coat (or a base coat) of one of the more heavily pigmented greys (i.e. Paris Grey, Paloma or Country Grey). I apply a very thin coat so that the Pure White covers better and with less paint. On average, Pure White by itself takes 3-4 coats. If I base coat with a grey, I can usually get by with 1 1/2 to 2 coats of Pure White. (I also use this rule if I am painting black over white or red over light wood or white).
4. After you get that first coat of Pure White (and maybe even the grey), you may start to see bleed through. Treat bleed through on a case by case basis. I personally don’t assume that every piece of furniture is going to bleed through. I have saved myself a ton of time and hassle because more often than not, bleed through isn’t a problem. But, when it is (and it was for the nightstand) I can deal with it appropriately.
4. If you experience bleed through (which you’ll know after you put your first and/or second coat of paint), you need to seal the piece of furniture so that the tannins are trapped beneath the newly applied protective top coat. The most common product used to seal tannins is shellac. And, while I keep shellac on hand for just these types of problems, I will usually use Miss Mustard Seed’s Tough Coat before I pull out the shellac because it is a water-based top coat that is easier to work with and less likely to cause other problems (like over application that leads to craqueling).
5. Once the shellac or tough coat is applied, I let the piece dry for a minimum of 24 hours before I apply a fresh coat of paint.
6. Finally, assuming there are no more tannins leeching through the paint, you can add your Clear Wax.
NOTE: You can apply shellac or Tough Coat over paint but you CAN NOT apply it over WAX.

When it was all said and done, this guys got one coat of Country Grey with a coat of Pure White. As soon as the white was dry, there were patches of bleed through all over the front, sides and inside of the shelf. I put on Tough Coat and let it dry over night. I then added two more coats of white (this guy was stubborn). And, since it wasn’t received any distressing along the edges or details, the paint finish needed to be built up and much cleaner. Finally, Clear Wax sealed the white adding the characteristic sheen and subtle depth of color.