I’m starting to close in on two years with a retail spot. In the beginning, my husband challenged me…”what are you going to do when trends change?” My response was to change with the trends or quit doing it when home decorating trends are no longer “my style.” After all, we all change our style over time! Just look at your high school yearbooks to discover that.
While the niche market that I appeal to in home decorating and furnishings hasn’t changed as of yet, the nature of my business is definitely shifting. It’s exciting and nerve racking all at the same time. Over the past twelve months, I am seeing a tremendous rise in the sale of paint and DIY accessories! So much so, that in January I sold over 200 cans of paint and wax and ran out of all but four boxes of milk paint. That’s somewhere around 1,500 pieces of furniture given new life…transformed…re-loved!!!!
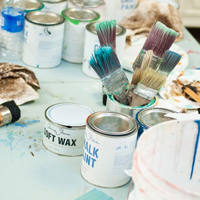
That’s amazing! And, as a result of this growing “do-it-yourself” trend, I am finding that, as a store I need to grow with it. So, I decided I needed to abandon my measly 50 square feet of “paint space” and create a more prominent DIY Center in the shop.
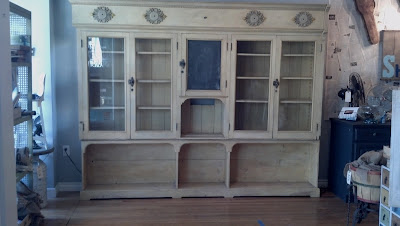
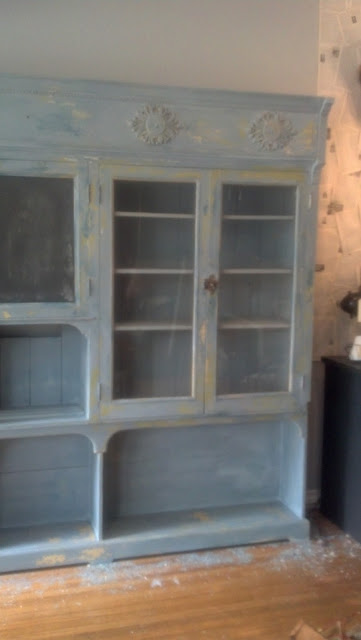
First, I needed a more permanent and prominent display piece for Annie Sloan Chalk Paint and Miss Mustard Seed’s Milk Paint. I found this antique, turn of the century cabinet right here in Glendora on craigslist. I went to check it out on a Sunday night and was practically begging the guy to drop the price just a little. He was asking $600 and I was really hoping to get it for around $450/$500. But, he wouldn’t budge an inch on the price. I went home and slept on it. Showed pictures of it to a few people. Talked about it with my go-to business associates and finally decided I couldn’t live without it despite the price. I had to invest another $100 in a delivery service because at nine and a half feet long and over seven feet tall, this was way out of my lifting and carrying capabilities.
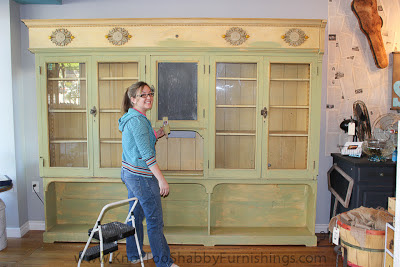
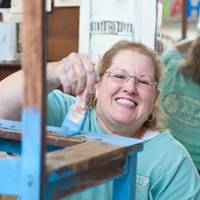
Once it was in the store, we didn’t waste any time. That’s Maddie! She’s our Thursday intern and we love her creativity (plus, she is awesome at staging the shop)!
I wanted the end result of this piece to look primitive…appear as though it was forgotten in an old house or barn for decades and painted over and again during its life. During one of our workshops about six weeks ago, I was playing with the hemp oil and paint on molding strips to see if the oil would prevent the paint from bonding to the finish so that it would chip. And, it did! I decided to use this piece to experiment with the oil and milk paint on a larger scale.
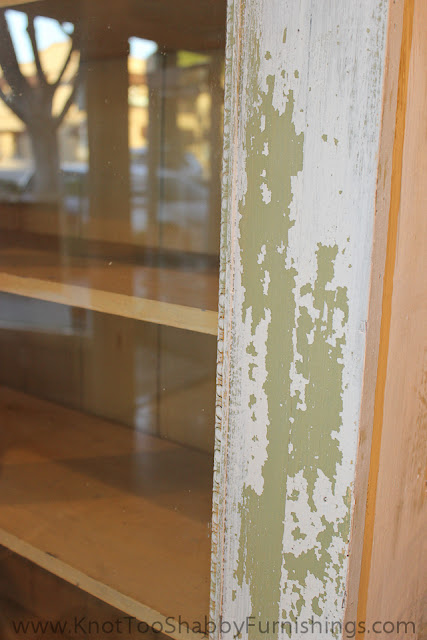
We started with Lucketts Green which was a nice complimentary color to the yellow. Once the paint was dry and chipped, we layered a coat of Miss Mustard Seed’s Hemp Oil over the whole thing. The hemp oil would cause the next coat of paint to resist bonding and chip (I hoped).
The next coat was Linen. And, it chipped as hoped and planned. Another coat of hemp oil.
Third coat, French Enamel.
More chipping. Not as much white peeking as I had hoped, but that Lucketts Green is coming through beautifully. More hemp oil.
Fourth coat, Shutter Gray to match the inside shelving.
More chipping. My three year old wanted to help. My thought was, “what the heck. There’s not much you can do to mess it up so go for it!”
More hemp oil. Much more liberally before the final coat because I wanted the final coat of paint to chip more than the other colors.
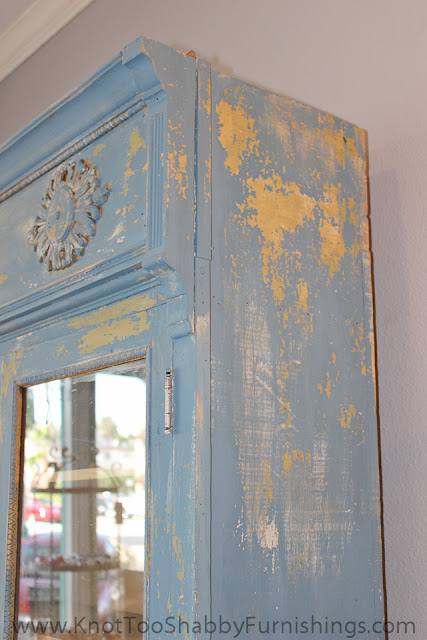
Final coat, Flow Blue.
This is how it turned out.
In Annie Sloan’s new Workbook, she writes “try to avoid using more than three colors together on a piece. Unless you are very experienced the effect can end up looking too much like a circus or harlequin.” I know what she means. I like how this piece came out, but it’s verging on too much. Too much color within all of the erratic chipping. Because off all the color, it is a little overwhelming. But, it was a good experiment and it provides for a great sample of what the milk paint is capable of doing in addition to how the different colors compliment each other.
I love the original hardware.
Awesome shelving on the bottom for the burlap “project” bags we sell.
The chalkboard on the front door was there when I bought it and is on a tin backing.
The mess of chipping paint after five coats! I’m going to be seeing blue chips for months!
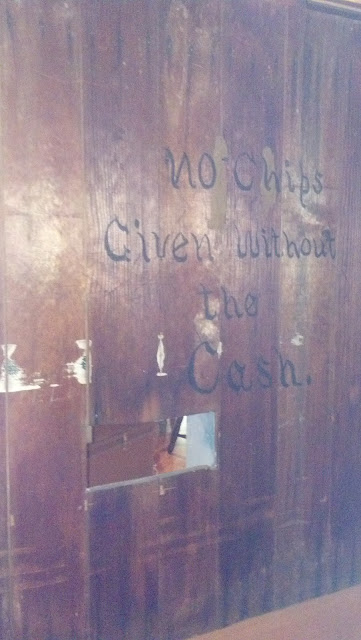
When I first inquired about this piece, the owner told me that it was from the Green St. Hotel in Pasadena and was from the early 1900’s. There is a small peep hole cut out of the middle and the back has an inscription that says “no chips given without the cash.” Most likely, this display was a faux wall to an illegal gambling hall.
Cool!
A little piece of California history.
This is the first piece of furniture I have ever purchased with the intention of keeping. Hence the higher price tag and labor involved. But, everything has a price, right? The price tag says “this beauty is not for sale…unless you want to pay an obscene amount of money so I can take my family on a Disney Cruise…in which case, I would sell it.”
So, your take home tip from me to you:
If you want to manipulate the chipping of the milk paint, hemp oil provides a perfect barrier between coats or on the original finish. The more liberally applied, the more the paint will chip.




That was no small undertaking but you did a great job!
Wow! Congrats. It’s beautiful.
Love…love…love it!
My sister lives in Covina ( Sunflower off ramp) and I need to pay her a visit, I figure she can’t be too far from your shop so we need to drop in so I can see that picture in person.
I have heard that hemp oil can be used for this but haven’t really tried it yet. This is awesome! You are bold to try it on such a huge piece, I think it paid off 😉
This is gorgeous!
She’s not far at all…about 10-15 minutes! Would love to have you stop by and say hi!
I’m impressed! I understand your struggle over the asking price – I’ve done it myself. Then, I’ve either lost out on a piece (and regretted it), or am privileged to have a special piece in my shop (or home). Good for you – and I can’t wait to try this~
Teresa, http://www.theporchatelier.blogspot.com
I absolutely love this! I can’t wait to give it a try. I recently tried the hemp oil as a resist, but it didn’t chip much. I think I must need to apply it a bit more liberally. I love the layer on this piece! I just hopped over from the retailers fb page. Great stuff!
Perfectly executed! I love it!! I also love your little helper. I have one, too and he loves helping Mommy make a “mess”. 😉
OK – this is just jaw dropping gorgeous!!!
What an incredible job you did on this piece
I SO have to try milk paint ( embarrassed because
I must be the only one that hasn’t jumped on the band
wagon with this yet )
XOX
I think your cabinet is perfect chippy goodness! Thanks for the tip on the use of hemp oil! I wonder if you used vaseline in spots if that would do the same thing? Beautiful job.
Wow! I love that layered quality of the chipping and it must have been so fun to do. It is such a large piece that I think it carry all the colors. So the hemp oil between coats prevents further chipping if with just one coat? I’ve been using the hemp oil on wood stain and love it. I’d love for you to share this at my Silver Pennies Sundays link party – http://www.findingsilverpennies.com/2013/02/silver-pennies-sundays-link-party.html
What a cool finish!
It is a beautiful piece!!
This is beautiful! I have to recreate this look on a set of custom made bi-fold barn doors that were made using new white pine for a client. I am very nervous- but your piece and tutorial inspired me! How many quarts of chalk paint did you use? Also was the paint (not the oil) Annie Sloane or the Miss Mustard Seeds? I have access to both. 🙂
Any help would be appreciated!
Sweet Holy Moses! You did NOT over do it at all! There is no such thing….at least not in Texas. Every layer suggests a different life and time for each piece and my favorite authentic pieces have 5-7 layers. This is absolutely a launching point for my new favorite hobby!
May I ask the mixture for the green color? It’s the color I want to use for my kitchen cupboards!