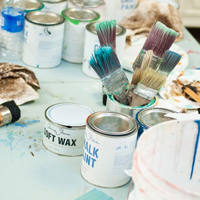
I don’t like to waste paint. That’s one of the hardest things about working with milk paint. It’s hard to know just how much to mix for a given project, and since leftover paint doesn’t last very long, it more often than not gets dumped.
Wait…who am I kidding! I don’t dump out paint!!! That’s a crime. In some instances, however there isn’t enough left over for an entire project. That’s what happened when we started working on this great quilt cabinet.
I had a smidge of Miss Mustard Seed’s Grain Sack left over from a dresser but wanted to paint this piece in Shutter Gray. So, we added Shutter Gray to the existing Grain Sack for a softer color. No paint wasted!
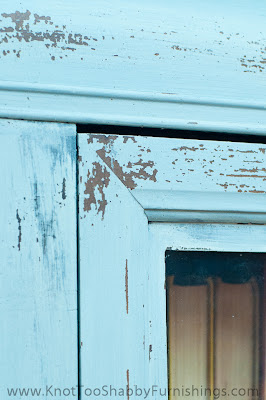
Once it was time for the second coat, the first coat already started to have a delightful, chippy finish.
Since we couldn’t replicate the Shutter Gray, Grain Sack mix, we went with straight Shutter Gray for the second coat…which, I happened to have left over from another project. Problem was, my leftover batch of Shutter Gray had some of the bonding agent in it. To ensure that the second coat of Shutter Gray wouldn’t adhere to the already beautiful chipped sections, we layered some Vaseline over the chipped parts so that the paint would wipe off where it was already distressed. (This was my second attempt at using Vaseline to distress. My first attempt was rather disasterous, but I think I learned my lesson. You can read about that faux paus here!!!)
The result was this beautiful yet subtle tone-on-tone gray combination that looked as though this piece had been sitting in a sitting room and was faded by the sun!
The chippiness from the first coat was preserved because of the Vaseline barrier.
A diamond cut glass crystal knob replaced the original brass one on the door but still compliments the original handles on the drawer.
This is just one of those instances where pictures don’t do this piece justice!
I’m not exactly sure what this cabinet’s original intent is, but it struck me as the perfect quilting cabinet. The vivid colors of the vintage quilts I have add a striking pop of color, yet compliment the time period that this piece was made.
I have to give props to our weekend intern, Sabrina! She painted this cabinet from start to finish and I think might be hooked on milk paint!!!


It looks beautiful and I think it makes the perfect quilting cabinet! xo Diana
Its even more beautiful in real life which is a,axing seeing it photographs beautifully. I loved meeting you Michele. Thanks for a wonderful and memorable morning!
Fiona
Hi,just found your blog and love it.The colour of the cabinet is just perfection! Am now following you.Please pop over and visit me soon..xx
love this!
no paint goes to waste here either!
hope you’ll have a moment to stop by, and i’m hosting a giveaway as well today:
http://hellolovelyinc.blogspot.com/2012/12/personalized-lovely-giveaway.html
peace to you.
michele
Wish I had the courage to do that-its lovely! I can’t get folks to even buy painted furniture here, much less chippy. WAY to conservative.
But I keep on painting anyway!
Small House /Big Sky Donna, Hand-Painted Vintage Transformations
BLOG: http://smallhouseunderabigsky.wordpress.com
This is sooo cute! Great color combo, I love it.
The finish is gorgeous! What a beautiful piece. I’m guessing it was a china cabinet. I was contemplating using milk paint on a dresser I just sanded. I think you convinced me to do so. Thanks
I love what you’ve done with this piece. It is fantastic! Thank you for sharing. Patti