
In addition to holding myself to the standard of refinishing about five + pieces of furniture every week, keeping up with my day-to-day household tasks (which, I might add I’m not doing very well seeing as how dirty laundry is pouring out of my closet begging to be done) and keeping up with my girls, I’ve decided that now is a good time to re-decorate my entire house. It’s pretty much a form of self-inflicted torture! But, helping other people decorate their spaces really gets my creative juices flowing to decorate my own space. Plus, it needs me to make some changes! So, I thought I would share one of my home decorating projects and the thought process behind my extensive (yet inexpensive) change. My living room:


I know…you’re wondering…”how does she go home to that lack-luster space every night?” Trust me…I’ve been asking myself the same question.
Design tip #1: Before you re-do a room, ask yourself, “how do I want to use this space on a day-to-day basis?” Then create a living space that will suit your functionality.
My old living room (above) was used primarily as a sitting room. The piano was the heart of the room, so-to-speak. My husband teaches private music lessons a few days a week so this room was off-limits during lessons and had to be kept in reasonable order so that it was “lesson ready.” Unfortunately, the living room connects right to the kitchen. Which meant making dinner during lessons, doing laundry, or cleaning was a constant distraction. Plus, the computer, tv, toys were all kept in the family room in the back of the house. When mom makes dinner, she is all alone while everyone is playing in the back. 🙁 We are flip-flopping the two rooms. Living room (which will actually be more of a rec room) will move to the back of the house and the family room is moving to the front.
Design tip#2: Before you make any major changes to your space (paint, furniture, flooring), find your design inspiration!

Like this authentic burlap coffee bag that I snuck brought back from Hawaii this summer. The inspiration behind my entire room transformation (both front family room and kitchen) is centered around this single burlap bag. I know…weird! I love it though. It’s earthy, but there are a lot of colors to pull from!
Design tip #3: Neutralize your color pallet.

If you had told me five years ago that I was going to paint my walls cream, I would have shook my head, “no way!” I am a color girl. I LOVE color. But, the green that I chose when we first moved in has been so limiting. I know everyone says, “use color with your paint! It’s so cheap and easy to change.” And it is cheap, but who wants to re-paint when they get sick of the color. Not me! What, with three doorways and a large window, that is a lot of cutting in and detail painting. No thank-you. So, I will bring color in seasonally and with a piece of furniture or two. And, if you are into holiday decorating, think about how your seasonal decorations will look in your space. I made that mistake when I painted my kitchen a great teal color. I loved the color, but come Halloween, Thanksgiving and Christmas, the decorations looked nasty against the teal paint.
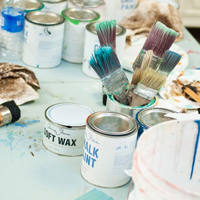
Design tip #4: Don’t be afraid to DIY (do it yourself)

Aren’t they lovely? That is the original wood floor, hiding beneath the yards of thick, beige, dirty, grungy carpet. Reality: we had no idea what the wood was going to look like. But we took a risk and pulled up the carpet knowing that there was no way we could afford to replace the floors if these looked terrible, nor would we be able to hire a professional to refinish them. So, we went with it and this is what we found. $55 to rent a drum sander from Home Depot and 35 minutes stripped all of the glue and varnish. A matching coat of stain ($16 for two cans) and polyurethane ($32 for two cans)…voila! A brand new floor for $103!
Design tip #5: Take a risk and do something original!


u r a positive looney
cant wait to see how’d u get on
Those floors ALONE sing va-va-va-voooooooomm! It’s gonna look LOVELY…