
I love Annie Sloan’s Graphite! I tell customers, “if you want to have the sophisticated look of a rich, black finish without the harsh look that most black paints offer, Graphite is the perfect color.”
It is also the color that gives painters the most grief (I base that assessment solely on the number of phone calls I receive from individuals seeking help with their Graphite projects).

Graphite is not black! In fact, none of the Annie Sloan Chalk Paints have black pigment in the colors, including this one. Out of the can, graphite is…well, just that; graphite color. It is the color you would typically find on a “black” chalkboard. A rich, deep slate grey.
So how does that slate grey turn into a richer, deeper shade of black? With Dark Wax.

In fact, Graphite is the only ASCP color that you apply Dark Wax to without a base coat of Clear Wax.
Because of the sheer number of inquiries I get relating to painting with Graphite, it seemed fitting that I offer some tips on how you can work with Graphite with ease!
1. Texture Matters
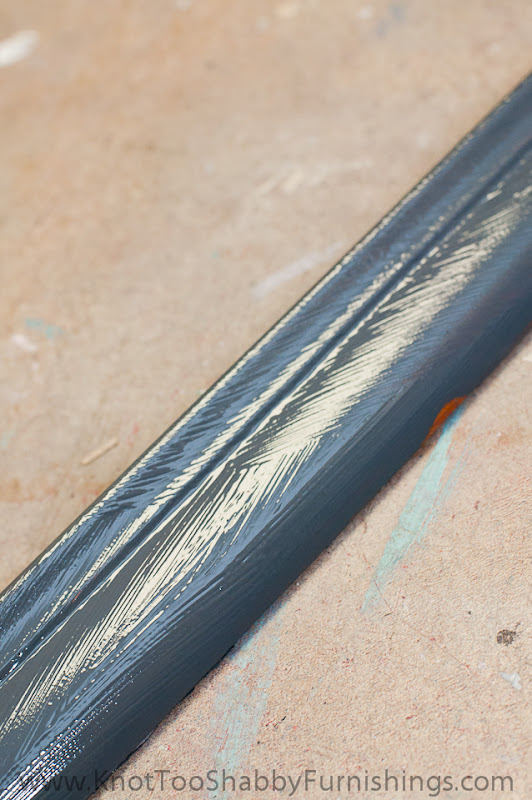
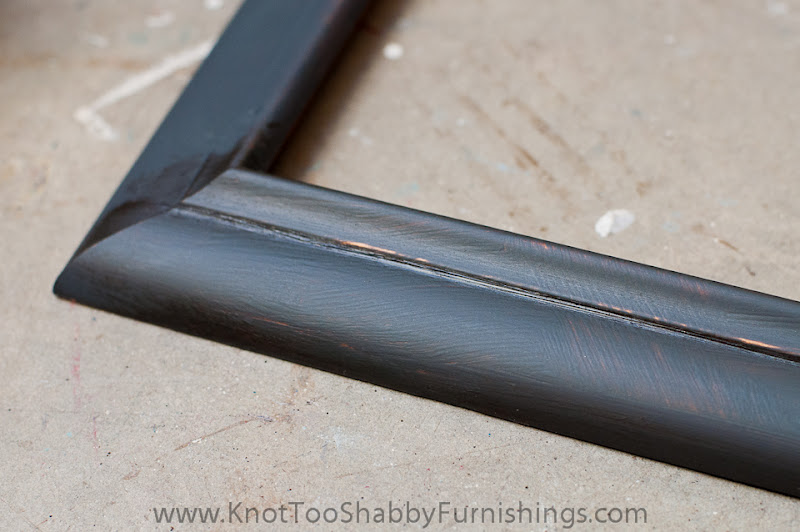
Dark Wax fills into areas of texture. The more texture in your paint application, the darker the end result. When I paint with Graphite, I will typically use a thicker brush or even a 2 inch wax brush to apply the paint.
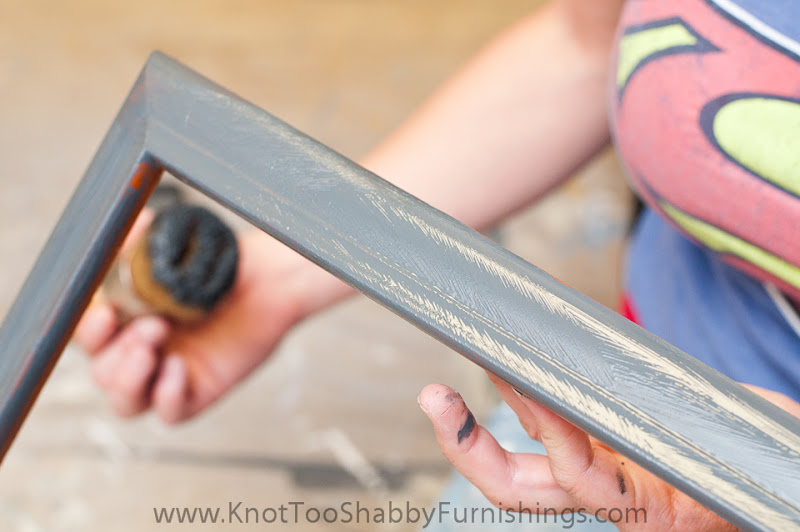
I use a multi-directional paint technique so that the brush strokes are going in all different directions.
2. Smoothing Your Finish

If you happen to be one of the individuals that won’t defy traditional paint practices…and by traditional paint practices, I mean paint in all different directions for a super textured, brush-stroked finish…you can still get a dark finish with a smooth application.
For a smooth finish, I like to use a regular paint brush, appropriate to the size of the piece you are working on.

Paint with the wood grain moving from top to bottom. Then, dip your paint brush into water and paint over the area you just painted with just water.
Just remember, with a smooth finish, the final result with the Dark Wax applied will not be as dark or as “colorful” as with a high texture finish.
3. Applying Wax
Waxing is what causes the most problems for individuals.

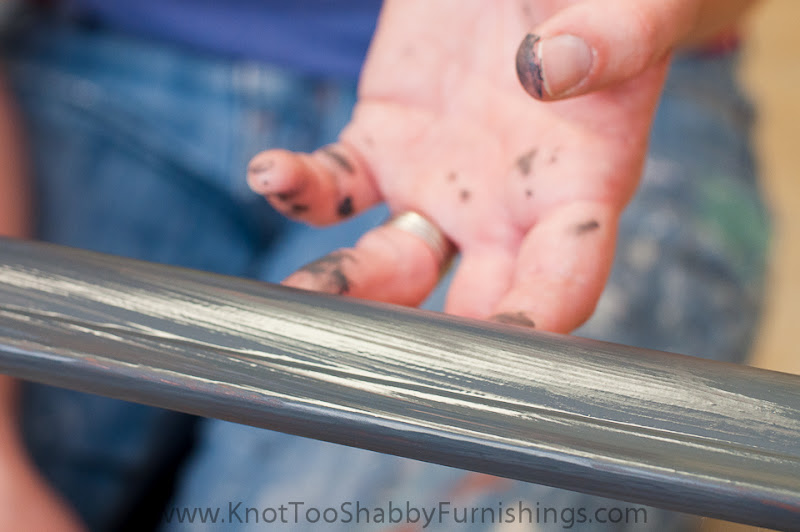
Assumption: The more wax I use, the darker it will be!
This is only partly true.
For starters, when you begin waxing your piece, your eyes will have a hard time adjusting between the graphite in its natural paint color and the graphite with the dark wax. In some ways, it all just looks the same while your working on it. If you get discouraged by the perceived lack of change in color, just take a step back and look at it from afar.
If it doesn’t look dark enough, don’t add wax upon layer of wax upon layer of wax. TRUST ME! It will not turn out well for you if you do that.
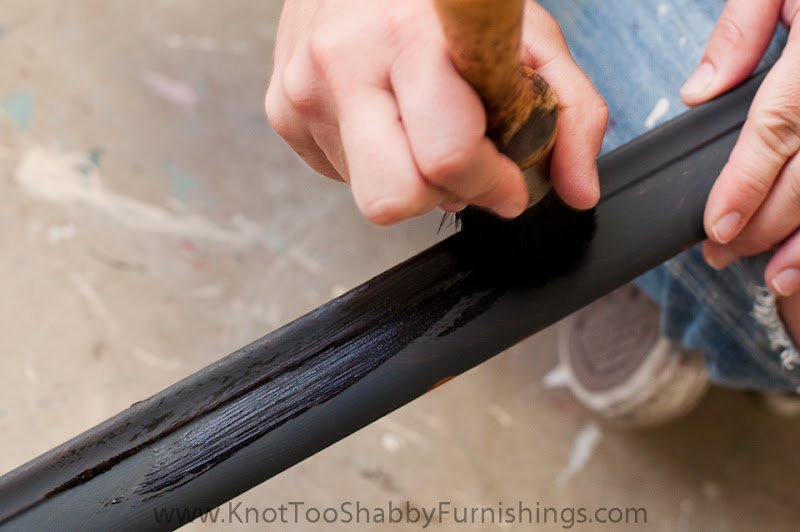
I tend to be on the conservative side when using wax. HOWEVER, when waxing Graphite, I will usually apply with a heavier first coat. I work it into all of the painted brush strokes and patterns within the wood so that the Dark Wax settles into every nook and cranny.
4. Wiping the Wax
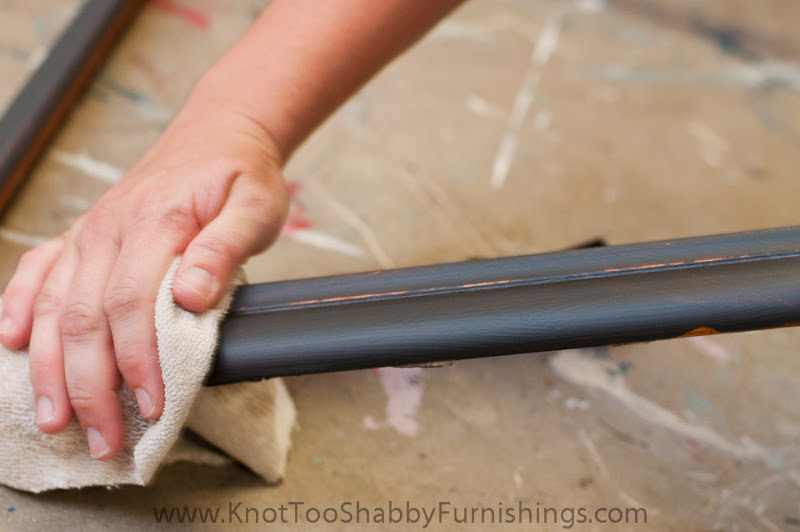
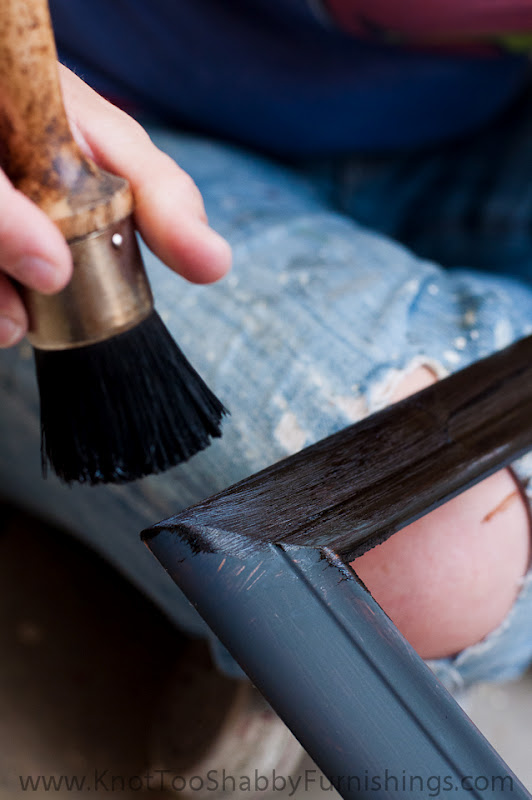
ALWAYS..I repeat…always wipe off the excess wax immediately!
Assumption: If I wipe off the wax, the protective finish and dark color will be removed.
The most frequently skipped step in the waxing process is immediately wiping off the excess.
First off…what does the wax do?
As the wax dries, or more accurately hardens, it creates a protective layer that acts as a buffer between the painted finish. It helps to prevent scratching, nicks and dings in the wood. It adds a finished sheen, eliminating the flat look and feel of the paint without wax. It also creates some water resistence so the furniture will not be (as quickly) damaged from water rings or spilled glasses.
To explain why it’s important to wipe the excess, I need to explain what happens if you don’t wipe.
An overly thick application of wax, once hardened or dried feels sticky to the touch. Imagine that you are wearing a sweatshirt, you lean your arms on a table and when you go to move them, the sleeves peel off from the tabletop, leaving tiny fibers from the fabric in the finish. That’s an indication of too much wax that wasn’t immediately wiped off.
When it’s time to buff the finish, rather than buffing into a finished shine, the excess wax will be moved around the piece and take on a streaky, cloudy look.
To remedy that, you will have to buff…and buff….and buff…and buff. Or, you’ll get so sick of rubbing the darn wax that you’ll just end up repainting the entire piece and starting from scratch.
Case in point, wipe the excess wax. Wax with your right hand, wipe with your left. Do it immediately. YOU CAN’T WIPE OFF TOO MUCH WAX. Wipe until you no longer feel the pull of the towel against the surface.
5. Wait
Wax. Wipe. Wait.
24 hours to be specific…or until the wax is completely hardened. I suggest that after you wax (and wipe) your piece, wait until the next day to buff it.
6. Buff the Wax

You can use a soft cloth, buffing brush, old t-shirt, cheese cloth, etc. to buff. I like to buff in the light so I can see the shine come through.
If the end result isn’t quite as dark as you like, now is the time to add more wax. Follow-up with the same steps for waxing, wiping, waiting and buffing. The added layer of dark wax will help continue darkening the Graphite paint into that richer and deeper shade of black. It will also add yet another layer of protection to your furniture.
7. The Finished Result
It’s not black enough!
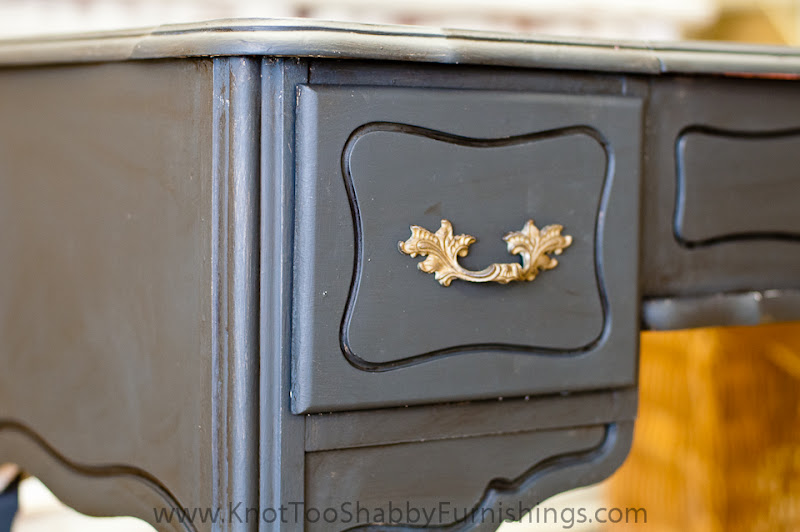
Well…it’s not black paint therefore isn’t a true black. In a room by itself, Graphite waxed and buffed will look black. But, if you put it side by side with black latex or black spray paint, it’s going to look more brownish, grey than black.
Similarly, with a smooth finish, like seen below, the final color wll be even less dark than Graphite, Dark Waxed on a heavily textured surface.

The finish is streaky!
It’s actually not a streaky finish you are seeing. Rather, it’s the variation in color throughout the peice of furniture as a result of the varying textures from the furniture itself or the brush strokes within the paint. Just like adding dark wax to Old White, or Duck Egg or any of the other Annie Sloan colors, there is a lot of variation within the color of the paint to give it the aged, antiqued look. It’s what makes ASCP pieces stand out from just ordinary, painted furniture. The same is true with Graphite. You aren’t turning gray paint into black paint, you are adding depths of color to the paint finish so that the end result is varying shades of charcoal grey that to the naked eye looks black.
There are cloudy sections!
If you have a finished product with cloudy sections, the most likely explanation is that you used too much wax, didn’t wipe the excess therefore it didn’t buff off entirely.
The secondary explanation is that the appearance of the cloudy sections is actually areas where the dark wax did not settle into the texture as much. Therefore what appears to be cloudy is actually just the Graphite color, closer to its natural shade than the Dark Waxed shade.

Lest you be discouraged about working with Graphite, I have to tell you that the first piece I ever painted Graphite I had to re-paint. I made all the classic mistakes (which is why I can write this post)!
Over the months, I have really gotten the feel for this color and love how it looks on furniture.

Added distressing compliments the color variation with the dark paint.


Below you can see the difference between Graphite with Dark Wax and Graphite without Wax.


I hope this is helpful! As always, call, email or comment with other questions or bits of advice!

Great tutorial, Michele. Graphite is one color I have not used. I did NOT know that none of the AS paints had black in them. How different. xo Diana
What a great post, Michele! You explained this really well. Do you mind if I share this? BTW, love seeing Waxine (TM) in the photos 🙂
Michele, very good info! I will be trying the brush dipped in water technique on those pieces I want smooth.
Thanks,
Michelle in Vegas
Absolutely! Thanks for passing it along 🙂
So glad I found your post! Just so happens I have a dining table and chairs that I’d like to try the graphite on. I think this will be very helpful. Thanks for sharing your tips!
Thank you have a piece I’ve been struggling with for two days using graphite! Ugghh!!
Great tutorial! I was taught to brush on wax and wipe smooth with wodge of kitchen paper but very few tutorials mention it! Am just about to start a dresser for a client in Graphite so some very relevant tips!!!
Enjoyed your tutorial – getting ready to wax a piece that I did in graphite. I had learned that if you didn’t use clear wax first, the dark wax would soak into the paint, permanently staining it.
Sonya-you heard correctly about the clear and dark wax, however graphite is the exception to that rule! Dark wax without clear wax over graphite is what gives it the rich shade of black. With the other colors, dark wax will stain it and not in a pretty way. In a dingy, dirty sort of way…especially the lighter colors.
great post!
I just read your post on graphite. Well, that explains a lot! My first purchase this week with the Anne Sloan paints was graphite. I also bought the clear wax, not the dark. My question is will it turn out ok using the clear and at what point can I sand a little bit off so some of the wood will show through, before waxing or after? Thanks!
I did the same, ~Graphite and clear wax, but it turned out really well. I sanded first to distress, but as the paint is soft it does come off easily. so creates a lot of ‘dust’ I find that it comes of less if you have waxed first but I still prefer to sand first…..I take the view I can always paint over if I take too much off! I used a fine sandpaper also. I think part of the fun is the experimentation of it all!