
We call Annie Sloan Chalk Paint “liquid gold.” At $40 per can, it’s not something to be wasted! I am passionate about the product and about teaching people how to use it properly…about how to maximize their can so not to use more than necessary.
When I get ready to start a new project, there are a few supplies I always have ready to go.
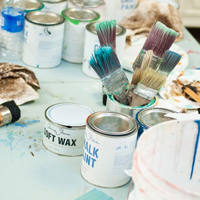
1. Paint Brush
2. Bucket of luke warm water
3. Fine Sanding Block
4. Two hand towels
5. Waxing Brush
6. Paint and Wax
7. and…a glass of water.


Enter my glass of water. Annie Sloan Chalk Paint is water based. That means it has no VOC’s, is odorless, can be used indoors and can be thinned down with water. When it comes to applying second coats of paint, watering down the paint just a little bit is, more often than not sufficient at providing a solid second coat while using a minimal amount of paint.
When the first coat is completely dry, I dip my paint brush in water, brush out the excess water on the side of the glass, dip the brush in my can of paint a couple of times and then start painting the second coat.

That little bit of water trapped in my brush is just enough to loosen the paint. The result is about half as much paint spreading on twice as much surface. When it’s all said and done, the second coat is applied much quicker, much smoother (if you like smooth finishes) with a minimal amount of paint!
For the musically inspired part of this furniture piece, I wanted to break up the primer red and add a touch of color that would compliment the “parchment” color of the original finish. Sheet music was definitely the way to go and I added a touch of free-hand scripting to the top drawer.

Prior to waxing, I treated the top drawer just like a chalkboard. I chalked out the lettering, erased it, chalked it again and then painted over with a black paint pen. I used my damp sanding block to clean off the chalk and distress the edges, then I sealed the whole piece with dark wax.

Normally, I would never leave gold brass hardware as-is…but…the gold on this one just seemed to work, so I left it in its original state.


The sheet music is vintage prints from the 1940’s so the coloring on the pages is authentically aged!

I’m not in love with how the free-hand musical notations came out, but for now I will leave it. If it doesn’t sell right away I will probably add a bit of Old Ochre to the top drawer.


We’re kindred spirits, I’d much rather paint anything that doesn’t move than cook, lol!
Your buffet looks wonderful! Thank you for sharing the water tip, anything to save some paint, as we pay even more up here in Canada!
Michelle this was such a good idea with the sheet music. I love the way it looks. I love how brave you were to do this. Great job.
Peggy @ southscapedesigns.com
Very cool treatment, def a conversation piece! I like the primer red, that color has a very farmhouse feel to it.