My kitchen has been a project ten months in the works. It is finally…sigh…done. Well, as done as any room ever is in my house!
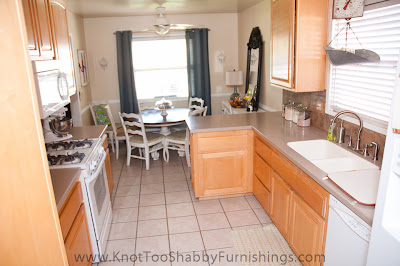
Before:
This isn’t really a true before picture. This is the “after” picture from last January. The real before had dark, dank green walls and no window treatments. Last Christmas, we painted the whole kitchen to lighten and neutralize the color. This is what we ended up with.
I brought some color through window treatments and new upholstery for the chairs.
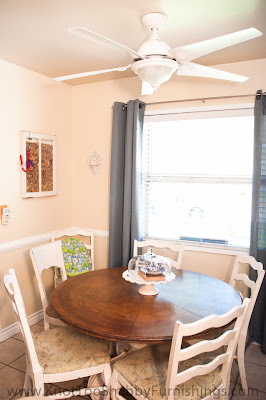
Honestly, I love upholstered chairs but am so over them in a kitchen that constantly hosts toddlers! So, part of my kitchen make-over involved ridding myself of the upholstered chairs and changing them out with new (I mean, old) wood chairs.
After:
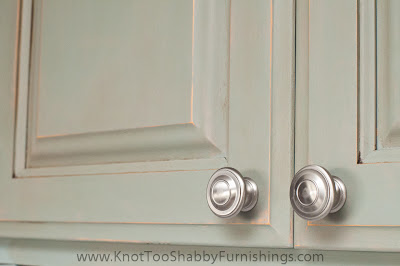
I wanted to do something different with the cabinets. Something a little edgier than just painting everything white. So, I took a risk and added color to the top and left the bottom ones neutral.
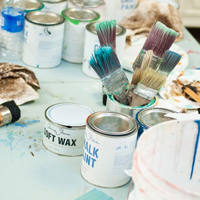
I mixed a custom color which came out to three parts French Linen to two parts Duck Egg Blue.
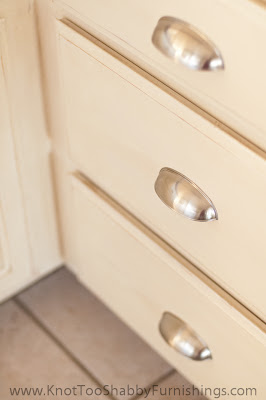
The bottom units are Old White and both uppers and lowers have a dark wax glaze.
And, new jewelry, of course! I love bucket handles!
The brushed nickel matches my fixtures.
I went “shopping” around my house for new window treatments and swapped the patterned ones with the plain in my family room. I kept the kitchen table (which is one of my all time favorite pieces of furniture in my house) and paired down the six chairs I had to just four. The white, burlap upholstered chair I’m keeping because my Papa saw it in his neighbors trash and pulled it out for me. He’s 93 years old and I thought that was so cool of him! I swapped out two white ones for the two antique wood chairs. No upholstery = perfect seating arrangement for my girls!
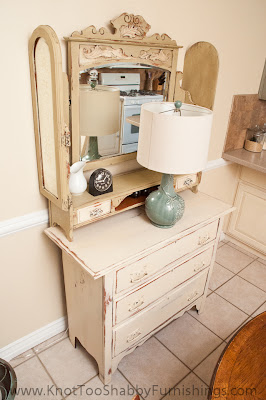
I traded out this vanity and mirror for a new piece of furniture…
…a different sort of vanity. But, I will blog about this piece at another time.
So, here’s the breakdown on how much paint I used and the total cost:
Wall Paint: I used Valspar paint and primer in one (Lovely Bluff) which was $32 a gallon.
Cabinet Paint: The lowers took one can of Old White, at two coats of paint. The uppers only took 10 oz. of paint. One coat. And, I used about one can of clear wax and maybe half a can of dark wax. So total cost of paint and wax was $91.
New Hardware: Knobs were in a 10 pack for $22 each and I needed two packages. The handles were $5 each. So total cost was $79.
New Rug: $50 from Home Goods
New Chairs and Furniture: Free…well, when you consider the fact that I already sold what was in its place.
Total Cost of complete kitchen make-over: $252.00
Not too bad for a completely new look!
I’ll blog later about how I managed to tackle this project in less than a week with a store, two little girls while keeping up with making dinner, doing laundry and all those other day-to-day tasks!
Link up your fun refinishing projects on our Wow Us Weekend Link Party, every Thursday night-Sunday!








Wow! What a huge difference the paint made. You did an amazing job! xo Diana
Looks goooood! I like the French Linen and Duck Egg combination. Very refreshing!
Beautiful! I really love the paint color if your kitchen. Great job repainting it! Nice kitchen design for my condominium philippines. 🙂
Your kitchen looks really great, Michele! Your cabinet color looks beautiful and I love that you put the color on top. I am always amazed with the power of paint. Looks like a completely different space. Thanks for sharing your pretty makeover at my place.
Thank-you!
Thank-you! I’m so glad it’s done…now just finishing touches!
Beautiful result! Was the original surface solid wood or a laminate veneer? I’d like to paint my own kitchen cabinets and am hoping I can use your approach, inspiring to say the least