
I stood in the kitchen last night after the kids were in bed and looked at my husband…I said, “now that the kids room is done I have another project in mind.” His shoulders slumped a little, he rolled his eyes and said, “of course you do.” What can I say? That’s how I roll. The girls bedroom was my last major indoor home redecorating project. Well, lets just be honest. No room in my house is ever “done.” I have a few little things to tackle, like fixing up the spare bathroom and making some changes to our walk in pantry, painting the hallway and sprucing up the laundry room. None of those are gratifying projects, though. So, indoors is going to take a break and I’m going to focus on cleaning up our outdoor space. The weather is perfect and I can’t wait to spend my afternoons outside!
Anyway, here is how the girls bedroom came out.
Remember the before:

After:

Before:

After:


Everything about this redecorating project had to fit into a category of stylish functionality!

I “bought” rolling storage drawers from knot too shabby as extra storage.

In total, there are four of them tucked away in the closet and bedroom stashing all manner of things from pull-ups to toys.

They are easy to roll out into the living room to keep toys contained and organized for playtime and just as easy to roll back into the bedroom. (I still haven’t taken the price tags off…oops).

We gutted the closet to make room for all of the kids clothes. We made use of every nook and cranny!

Vintage wire baskets line the shelves full of extra clothes, hats, scarves and outgrown clothing.
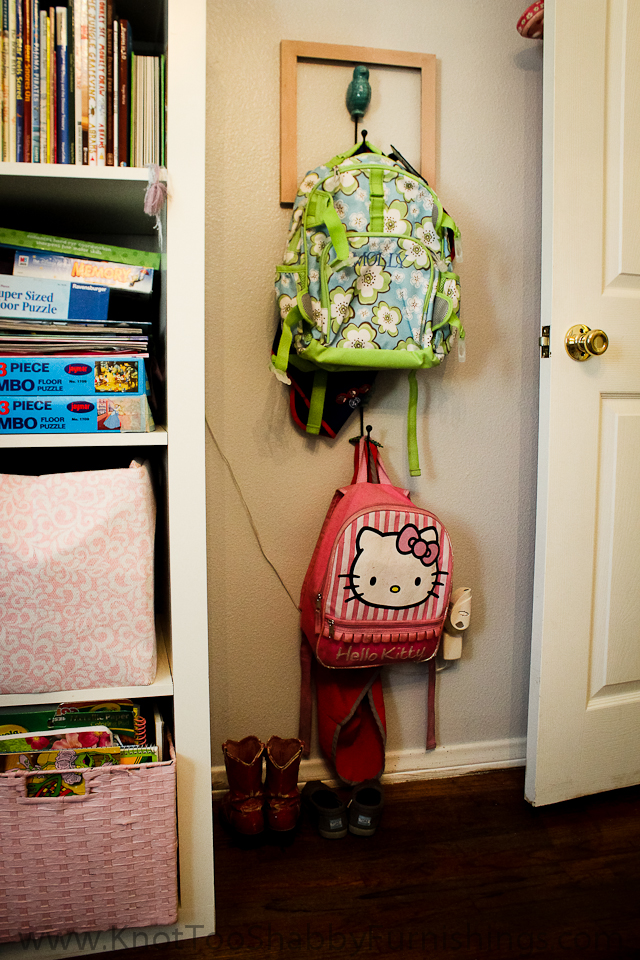
I put hooks on the wall for Awana vests and backpacks…the things that get strewn all over the house on any given day. Now they have a defined place.

Shoes hang on the back of the door. Concealed yet easy for the girls to pick out and put away.
Before:

After:

The Ikea cubbies went largely unchanged. We just cleaned out some old toys, got rid of some outgrown books and stylized the top.

I made my own version of artwork for the main wall. After all, it is the kids bedroom and it needed a touch of “them…” i.e. Hello Kitty, Princesses and Minnie Mouse. I found those vintage Disney Princess images on pinterest. I never did find the original source, so I used the pinterest image and blew it up to do an image transfer on a salvaged shelf from a bakers rack I had. The top wood piece is hand drawn and the art is actually hanging on the crown hooks. A nice little focal point for all of $15!
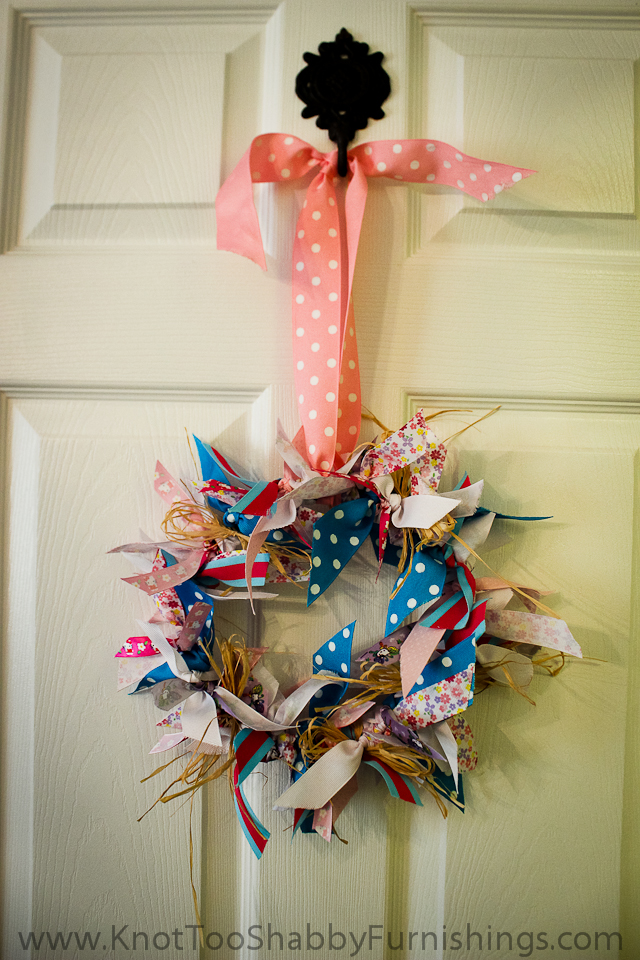
I also made a cute little ribbon wreath for their door. That’s where Hello Kitty comes in. 🙂 I let the girls pick out all of the ribbon for the wreath.
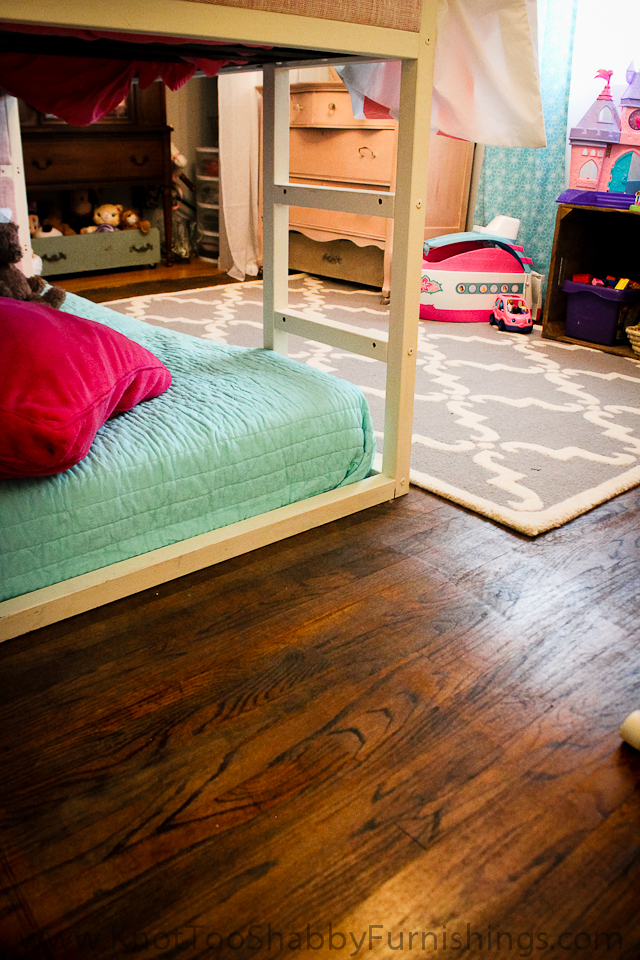
What do you think of the floors?
Before:

During:

After:
And the cherry on top…

The chandelier. Downright dreamy!
My original “pinspiration:”

So, here’s the breakdown…
- The teal bedspread and sham were from Bed, Bath and Beyond $112 (I used a coupon)
- The striped duvet cover with two matching shams were from The Land of Nod, a source I found on pinterest. The set was around $180 after shipping and tax.
- The rug and polka dot sheet set was as from Overstock.com. I got both from under $189. Originally, the rug was priced at $189, and the next day I went to pull the picture and noticed that it had gone on sale for $169. I called and got a credit, which I used for the sheets and a new duvet.
- The fabric for the pennant, curtains and to re-upholster the bed was $40 from Joanns (again, I used a coupon).
- The set of four sheers for the closet and window was $24.
- New curtain rods for the closet were $40 from Bed Bath and Beyond.
- I used Behr Paint called Silver Screen on the walls. I only needed one gallon because I had some leftovers from another project. $38
- The Mahogany Quilt Cabinet was $175. I bought from Strings Music during their retirement sale.
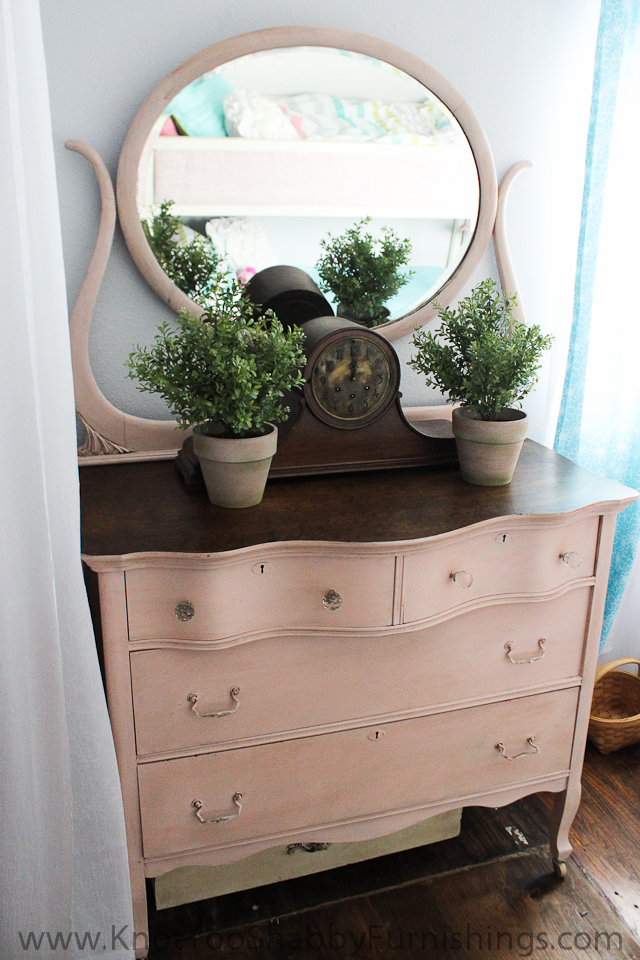
- The antique dresser was my Great Grandmother’s. It cost about $25 for new knobs.
- I spent $50 to rent the drum sander for the floors and another $20 for stain. I used Annie Sloan Lacquer on top of the stain to protect the finish which is $55.
- The chandelier was $3 and I used three cans of old spray paint to repaint it.
- New brackets for the closet were $30 but all of the shelves were re-used from the old fixtures.
- Inventory that I pulled from knot too shabby amounted to about $250. Mostly decorative storage pieces like the rolling drawers and crates, hooks and other decorations.
- And, finally I spent another $120 or so dollars on “fluff.” Pillows, the Boxwood wreath, and the ribbon wreath.
By the time it was said and done, this was by far the most expensive redecorating project with over 50% of the cost attributed to new bedding! The most major changes…paint, the wood floors and closet fixtures were the least expensive.
I will be selling the antique white hutch that used to be in their room to off set some of the cost. But, if the new space encourages the kids to keep it clean, keep their beds made and put their shoes away, it is worth every penny! So far, it’s working.

Michele- You did a wonderful job. I love that chandy and your storage ideas are fabulous. I’ll bet that it feels like you walk into a different bedroom. xo Diana