

I’ve been stuck at home today taking care of my very sick child. Between the tears and cuddling, I don’t really know what to do with myself. It’s not very often that I just get to be at home.
I am in the process of building a new website that will not only host the blog pages, but will also have an online store complete with a shopping cart, online workshop registration and a photo gallery. It’s been a daunting task and I’m realizing how outdated many of my photographs are. In the photo gallery, one of the tabs will be a “home tour”…pictures of the rooms I updated in my own house. I was pulling my photo files together and was a little shocked by how much updating I’ve done to my house since some of the original pictures were posted. A day at home seemed like the perfect opportunity to update my photographs for the new website. I still have a lot to do and don’t expect the new site to be live until the end of February…if I’m lucky.
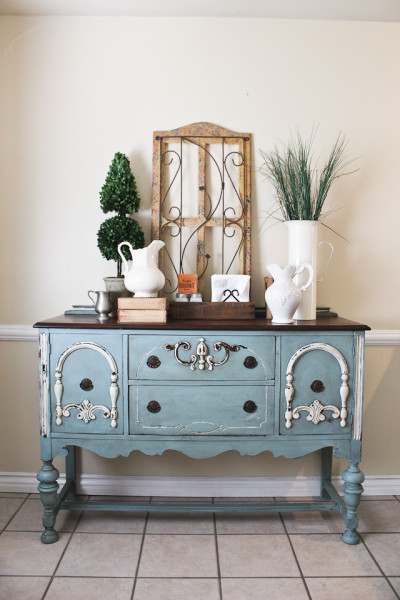
While I was taking pictures today, I was able to photograph the white buffet I just finished painting this past Tuesday.
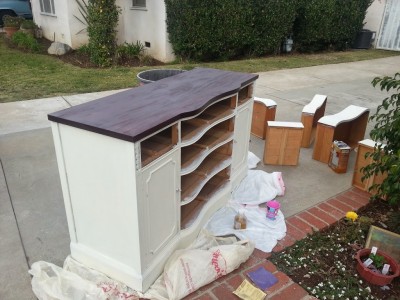
It started like this:
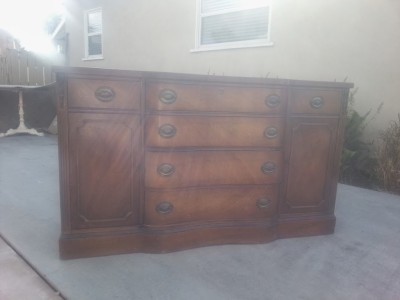
I found this buffet along with its matching china cabinet and an oak dresser on craigslist. The china cabinet and dresser are staying at the store, but the buffet is replacing this buffet that I’ve had since June.
I originally put this in the kitchen, then ended up moving it to the living room to go under the TV. I liked it, but the color started wearing on me. It was a little too bright for my space. I’m finding myself drawn to neutrals. I still have pops of color, but they are definitely more muted.
I couldn’t decide, though whether to go with Chalk Paint® or Milk Paint. Really, it was a no brainer. It was shiny, 1940’s style mahogany, likely to bleed. Chalk Paint® was the obvious course of action. BUT, I don’t have much painted in Milk Paint in my own house. I like having a sampling of the different styles. So, after much internal debate, I went with Milk Paint.
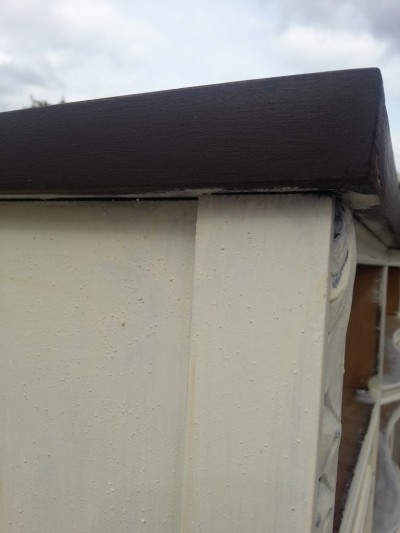
I didn’t want an overly chippy look which meant I would need to use the bonding primer. The top had to be stripped down and re-stained so I had to pull together the stripper, Curio and hemp oil. I went for Linen on the base.
First Step was to strip the top.
I use Klean Strip to remove the sticky, shiny varnish. I always do this step before painting. If the chemicals drip off the top and down the side, I haven’t ruined my paint finish.
Next, I started sanding using an 80 grit sand paper on a rotary palm sander.
Even with the sander, there was still quite a bit of varnish on top. So, I put some more stripper on the varnished sections.
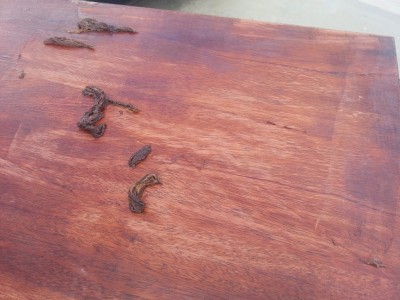
Once all the varnish is off, I wipe it down with a damp cloth to clean up the chemicals so they don’t gunk up the sandpaper.
Once it was sanded down to the bare wood, I used another damp cloth to wipe down the dust.
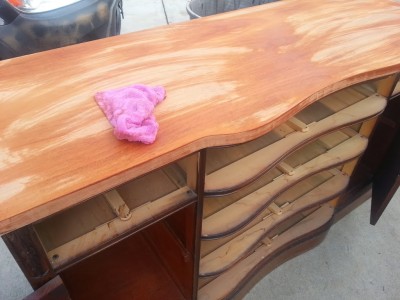
While that was drying, I mixed up a watered down batch of Curio to use a stain on top. Even the watery batch was thicker than I wanted so I grabbed another wet cloth to thin it once it was on top of the buffet.
While the Curio was drying on top, I used the same 80 grit sandpaper to rough up the base of the piece. I just scuffed it up a bit to give the paint something to grab to. All in all, it took about five minutes to sand the base, including the drawers.
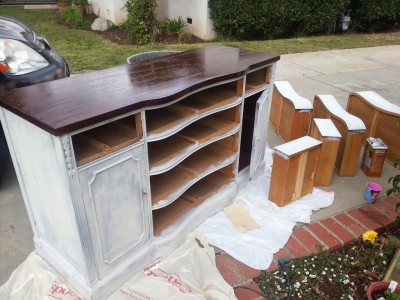
I mixed the Linen, added bonding primer and put the first coat on the base.
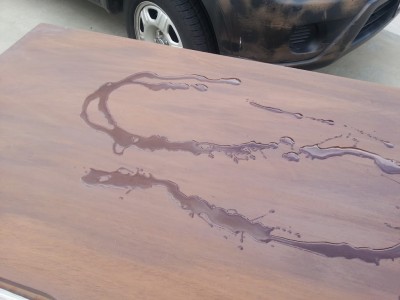
While that was drying, I added a coat of hemp oil to the Curio stained top.
I let the hemp oil saturate the top for about 15-20 minutes, then I took a 220 grit sand paper and hand sanded the top, working down the finish and smoothing it out. Then I wiped off the hemp oil.
*Now, here’s where I got to take a long break. I had to pick up my daughter from school, babysit the neighbors for an hour, make lunch…you know, mom things. All the while, the top and base got in a good couple of hours of drying time.
Once all that other stuff was taken care, I mixed up a second batch of Linen…actually, just adding a bit more powder to the left over first batch. I didn’t add any additional bonding primer to the second batch and made it a bit thinner than the first batch so that it would settle in the unfinished areas. I ended up needing a very light third coat in some sections.
I added another coat of hemp oil to the Curio stained top while the base was drying.
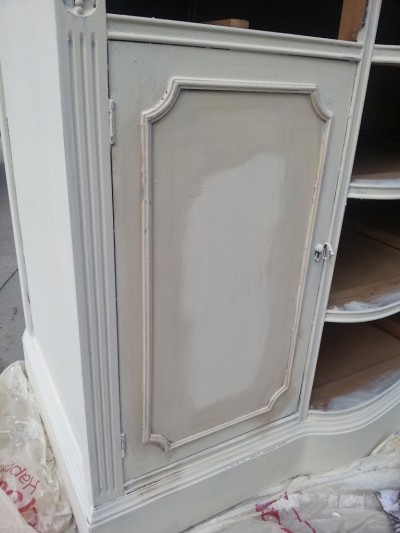
Once everything was dry, you can see how powdery and rough the finish is. That is something characteristic of milk paint, but nothing to be worried about.
I used hemp oil on the entire base, brushing it in pretty liberally (even over all the lumps).
I used the same brush on the base that I used on the top, so the Curio that was trapped in the brush transferred onto the white finish. I focused on the frames of the doors first, then did the drawers and finally the remaining base. I worked it all in to blend the darker edges.
After I oiled the whole piece, I took my palm sander and sanded the base to smooth out the finish. The hemp oil prevented the sander from taking off too much paint while working the oil into the finish. It also worked off the paint in a few areas just giving it a hint of chipping here and there. My plan was to seal the entire finish with clear wax, but when it was all said and done, it really didn’t need the wax.

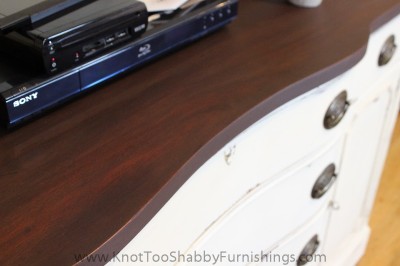
The Curio is really a rich brown.

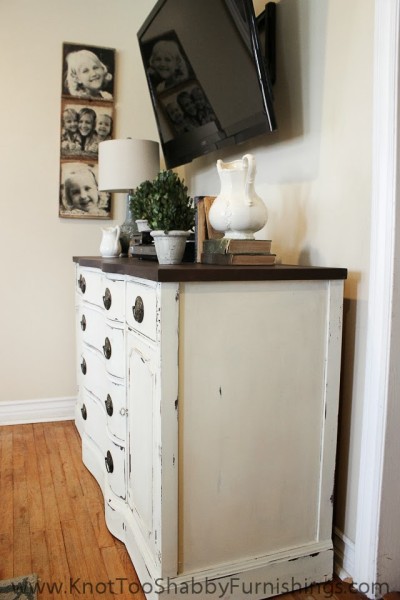
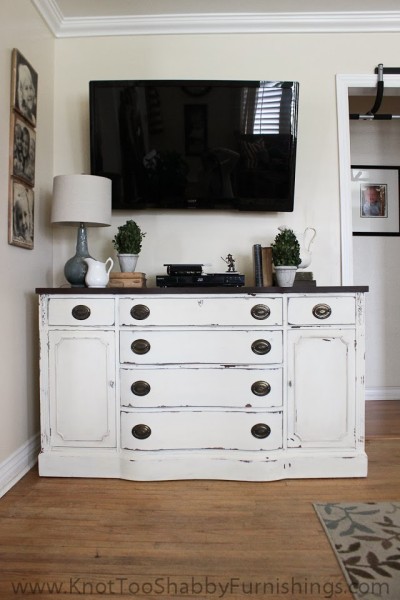
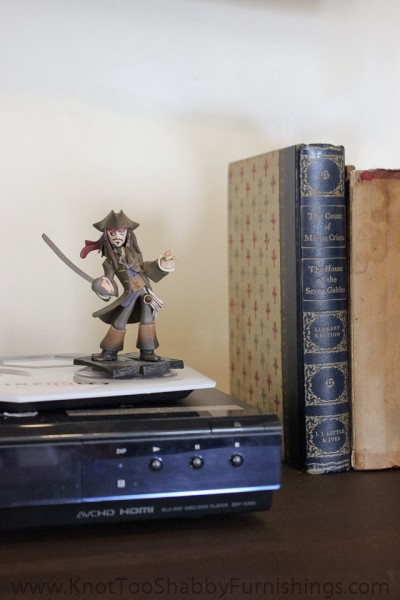
Jack Sparrow gets a prime spot on top, coupled with my collection of my favorite books, The Count of Monte Cristo.

I asked my husband if it was going to bug him to have to tilt the lamp out of the way to swivel the TV out. He said something to the effect of “do I really have to answer that?” I foresee having to move the lamp in the near future.
So, now I have a prominent piece in a nice Milk Paint finish. Had I gone with Chalk Paint®, I would’ve used a classic Old White finish with clear wax. It would have taken two full coats with a very light third coat in some sections. I wouldn’t have had to sand the base, but that took so little time it was almost inconsequential. Chalk Paint® is easier to clean up…no mixing bowls, whisks and spills on the counter. But, it wouldn’t have had any random chipping.

I like the randomness of the distressing of Milk Paint.
Intrigued by the process? We have a Milk Paint workshop coming up in March and it’s not too early to sign-up. I promise, once you start mixing and painting, any hesitation you had about using it will vanish! I guarantee it!

It’s gorgeous! Thanks for sharing your step-by-step process!
Absolutely beautiful… nice job!
That is one beautiful piece. Thank you for the details how.
Wow! Love it.
It turned out beautiful! Glad you had fun with the milk paint. I love using it and it has become my paint of choice. Good luck with the launch of your new site. I just did the same thing 3 weeks ago and it’s been alot of work, but alot of fun too!