All I know about couture is that I can’t even afford to say that word. Nonetheless, I decided to use French Couture inspired phrasing on a salvaged side table.
My before picture got lost somewhere, but I can tell you this table was ugly. Boring. Uninspiring. Blah. You get the point?
So, this is how I made this table.
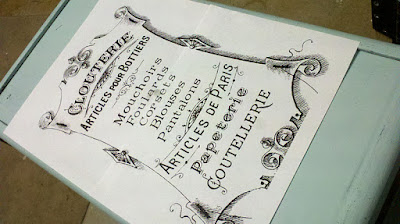
I found a great image on The Graphics Fairy to replicate on the top of the table.
I was specifically looking for a French inspired sign or print that I could transfer. I was hoping that in the end this would look like an old, weathered sign that was turned into a table or bench.
I loved the wording on this (what I assume to be) clothing and accessories store sign along with the mix of simple and fancy lettering.
Next, I downloaded this image onto blockposters.com. Block posters is a free website that takes your image and prints them on standard 8 1/2 x 11 sheets of paper so that you can get a sign as large as you need. If I wanted to print this on a dining room table, I could set my sign to print on six pages wide and block posters will format the image.
Once my image printed, I cut off the excess edges and taped it together so that it was a single sheet.
Then, I place my image face down and covered the entire back of it with pencil. So, this part is very technical! I took out the pencil lead of one of my mechanical pencils, placed it on the paper and used my fingers to roll it all over the back of the sheet. I used a generous amount of lead to do that.
Once the back of the paper was covered in the lead, I placed it on the table where I wanted to transfer the image.
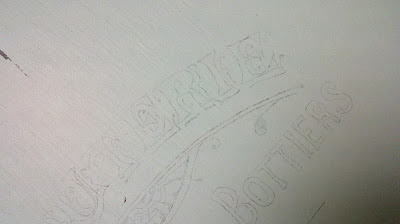
The next step included writing over the print with a regular ball point pen. I included all of the detailing around the letters. The pressure from the pen transferred the lead to the table.
This is what it looked like when I was done.
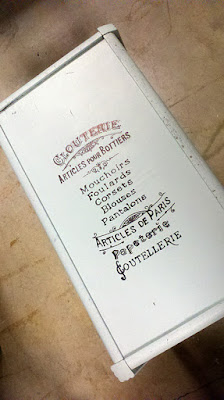
Once the letters were nicely transferred over, I filled them in with none other than a black sharpie. I started from the bottom, though so that the lead didn’t smudge while I was filling them in.
Lastly, I had to make it look like an old weathered sign. Fine sandpaper did the trick and all my hard work was put to shame when I sanded through the letters.
Isn’t it just perfectly “old!”
Anyway, I really like how it turned out and since it’s technically still Friday, I’m not breaking my rule by holding new pieces until next week. So, it’s for sale…today!


This is great! My friend just told me about your site.
robin
VERY nice! Love the graphic you chose and how you distressed it!
Very nice make over. Wish we could have seen the before.
I’m in love!! Michelle this looks amazing!!
-Laura (Tanamachi) Crane
Good info and such patience. Wonderful to know how to enlarge. Thanks for posting. Jo @ Let’s Face the Music
Fabulous! I’ve been dying to try this kind of stencil and haven’t worked up the courage. Yours looks awesome!
I am also a habitual collector of furnture My husband recently asked if we really need any more tables…duh!
Love your blog!
Maggie 🙂
Wow! It turned out great and that was a lot of work! Thanks for sharing. I’m visiting from the POPP party.
Love this table–great transformation!
Great job on the table! In case you haven’t seen this techinique, I came across a post on Whimsy art studios blog that shows how you can use a photocopy of an image and transfer it to wood or canvas using Gesso or acrylic matt medium. You simply coat the wood with the acrylic medium, place your photocopied image face down and then use a brayer or spreader to take out the air bubbles. Then you wait for the medium to dry and then use a little bit of water to take off the layer or paper and your photocopied image is left behind. This is a really neat idea for those times where you don’t want to hand paint an image on furniture. Here is the link. http://whimsyartstudio.blogspot.com/2010/10/canvas-of-beauty.html and here is another link to the instructions. http://www.wikihow.com/Transfer-an-Image-to-Wood-Using-Gesso
Brilliant. It looks shabby and wonderful! Good job.